Lockdown/Surgilig AC Ligament
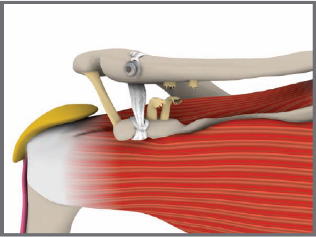
Lockdown (previously known as 'Surgilig') was developed by the Nottingham Shoulder Unit and was first introduced in November 2001 as a method of addressing failed ACJ surgery but has gained popularity in the last three years as a primary method of stabilizing the disrupted ACJ.
This artificial ligament provides a strong, flexible and permanent solution to AC Joint dislocations, with few complications to date.
The Nottingham Surgilig is a braided polyester material that has been modified into a purpose built ligament to provide strong biocompatible fixation that develops good tissue ingrowth.
Biological testing has proven that the ligament can endure enough mechanical strain to permit early postoperative mobilisation.
With a loop at each end, the prosthetic ligament is looped around the coracoid process, threaded through itself, then passed through around the posterior aspect of the clavicle and anchored with a cortical screw.
The Nottingham Surgilig is indicated for :
Surgical Technique
1 -The lateral end of the clavicle is exposed and the base of the coracoid identified.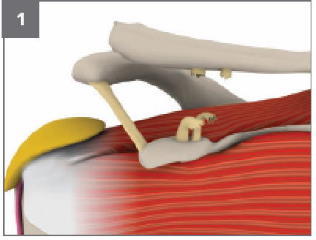
2 - 1cm of the lateral end of the clavicle is excised in the plane of the acromioclavicular
joint.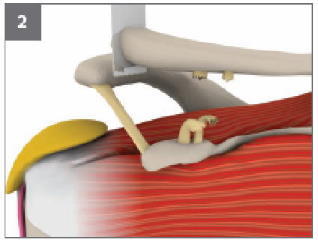
3 - The Surgilig Tubular Introducer is passed around the base of the coracoid from medial to lateral, staying close to bone.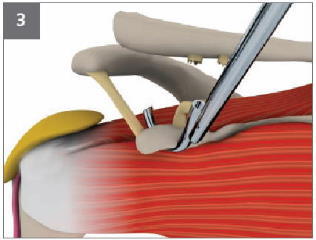
4 - The metal leader of the Surgilig Length Gauge is passed through the Tubular Introducer from medial to lateral.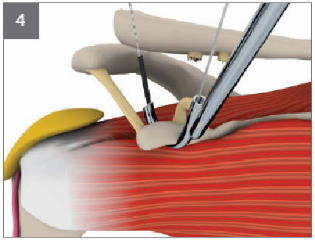
5 - The Tubular Introducer is removed leaving the length gauge around the base of the coracoid.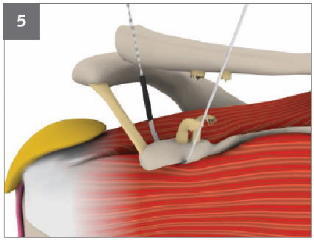
6 - The metal leader of the Surgilig Length Gauge is passed through the loop at the other end of the Length Gauge removing any slack.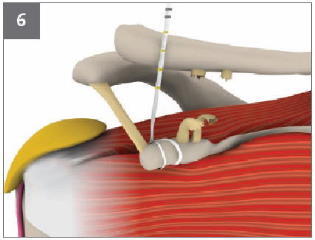
7 - The metal leader of the Surgilig Length Gauge is passed under the lateral end of the clavicle from anterior to posterior.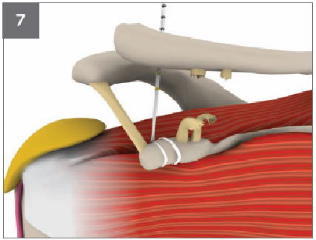
8 - The clavicle is reduced to its anatomical position and the Length Gauge is held in the planned position of the fixation screw to measure the required implant length.
N.B. The markings on the Length Gauge are 1cm apart. The double stitched mark represents an 11cm Surgilig.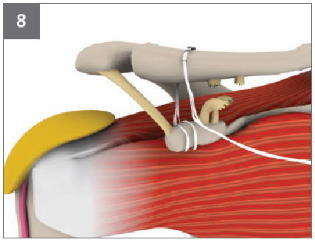
9 - The metal leader is passed back under the clavicle and back through its loop to undo the anchorage point. The length gauge is NOT removed from under the coracoid.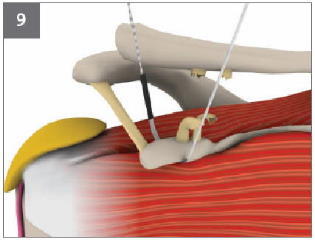
10 - The hard loop of the Surgilig is passed through the loop of the Length Gauge.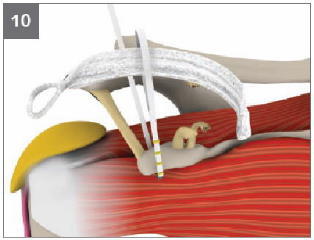
11 - The hard loop of the Surgilig is passed through the soft loop of the Surgilig.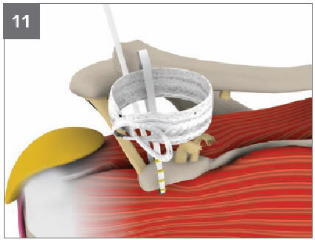
12 - The Surgilig is now passed under the coracoid by pulling the Length Gauge.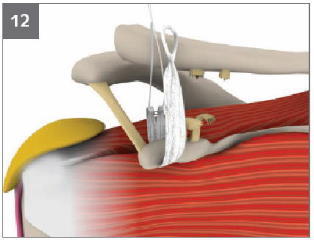
13 - The loop of the Length Gauge is now cut and removed.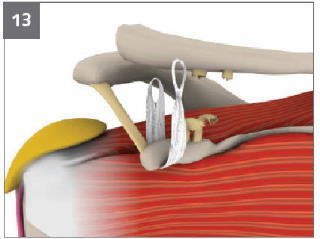
14 - The hard loop of the Surgilig is now passed through the Surgilig soft loop removing any slack using the Surgilig Loop Tensioner.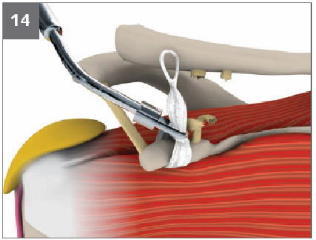
15 - The hard loop is passed under the clavicle and tensioned across the superior aspect of the clavicle with the clavicle reduced.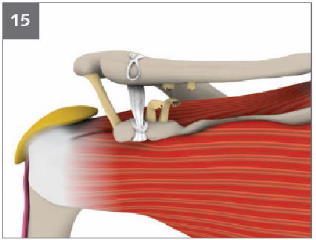
16 - The hard loop is anchored to the anterior clavicle in a 'tent peg' fashion using a small fragment 2.5mm drill and tap with a 3.5mm bicortical screw and washer. *
* Small Fragment kit NOT provided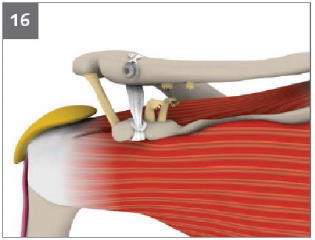
17 - All soft tissue is reconstructed over the top of the clavicle and acromio-clavicular joint, and the wound closed in layers.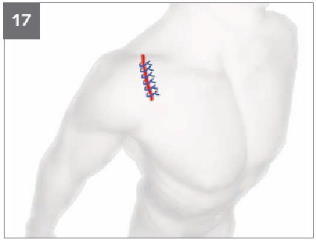
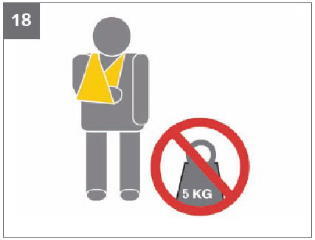
18 - The arm is supported for 2 weeks in a polysling and the patient is advised against heavy lifting for 3 months. Surgilig Acromio-clavicular Ligament.