
Rotator cuff
Keeping to the routine, the next part of the joint to inspect is the rotator cuff. The arthroscope is passed over the top of the long head of biceps and carefully withdrawn with rotation to get a good view of the rotator cuff (Figure 5.15). It is important not to withdraw so far that the arthroscope comes out of the joint, which is easily done at this point. Care should be taken to visualize correctly the rotator cuff that is now seen, and not the undersurface of the acromion. This may be mistakenly visualized through a massive rotator cuff tear, where the edges of the tear have retracted out of view (Figure 5.16). The arthroscope is now passed along the fibres of the rotator cuff and the humerus internally rotated to examine the insertion of the cuff (Figure 5.17). This is the area where cuff tears start, and small cuff tears could be missed. Often the tendon appears to thin out in a crescentic line at the musculotendinous junction, and this should not be mistaken for a tear.
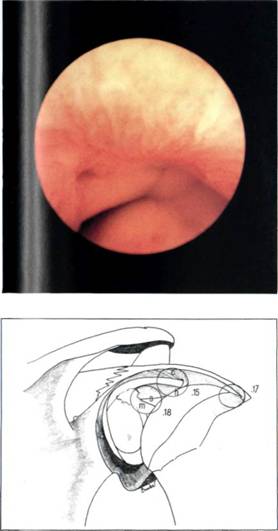
Figure 5.15 Normal rotator cuff above the biceps.
Having visualized the intra-articular portion of supraspinatus, the arthroscope is passed below the long head of biceps and into the intra-articular triangle.1 This is the triangle bounded above by the long head of biceps, medially by the glenoid and anterosuperior labrum, and is the guide to the anterior capsular structures.
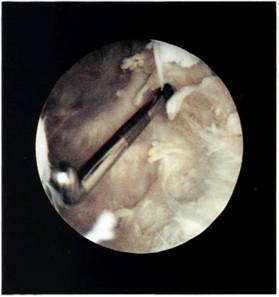
Figure 5.16 Massive rotator cuff tear. The undersurface of the acromion is seen directly, there is no cuff, nor can the retracted cuff edges be seen.
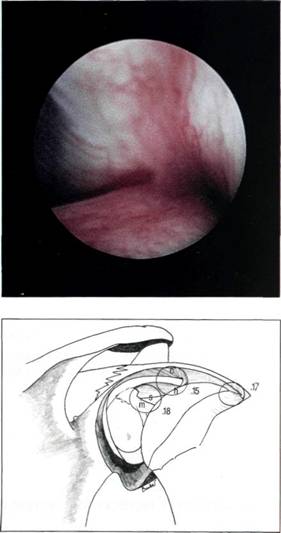
Figure 5.17 The insertion of the rotator cuff.
